Buyer's Guide To Rechargeable Bicycle Lighting Systems
 You know this trail as well as you know your TV remote, yet you flinch with every rogue shadow that passes under your wheels. Blasting through the trees and navigating the rock gardens with focused tunnel vision, you wonder how close that drop-off to the left really is.
Yes, you know this trail. But under the dim moonlight, you're riding it again for the first time and enjoying it in a completely different way.
Welcome to the world of night riding! Besides great fun, and a unique and exciting experience, night cycling is a fine way to fit your passion into a busy schedule.
With the right light, you can can head out before dawn or after dusk when you're off work. And, by riding at these times you'll enjoy a wonderful escape from the scorching sun and crowded trails.
A good bike lighting system turns night into day
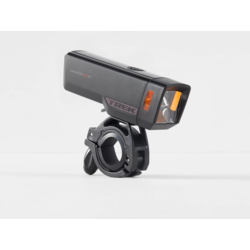
For this type of riding, you need one of our powerful and reliable rechargeable lighting systems. These have the oomph to turn night into day and make even technical trail riding possible after dark.
They boast a powerful beams and a rechargeable battery that fuels the light for a couple of hours, at least. These are sophisticated systems with many features and a wide price range. In this article, we explain some of the differences to help you choose the right light.
![]() First, a word about taillights
First, a word about taillights
While some high-tech rechargeable lighting systems offer taillights, most come with a headlight only. That's because the most common use for these lights is off-road bicycling where a taillight is unnecessary (assuming you don't ride the road to get to the trail, in which case you do need a taillight).
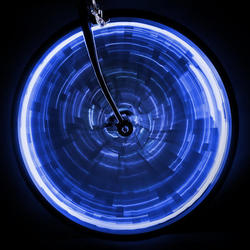
If you're using your superlight for road riding, either select a model with a taillight, or do what most people do and get an LED taillight to use with your rechargeable lighting system. These LED flashers (they usually come with flashing and constant modes) are plenty bright, affordable, lightweight, easy to mount and reliable. Plus, when used in flashing mode, the batteries last a long time. Lighting system configurations
For serious off-road riding you can mount a light on your helmet or handlebar, or if you want the ultimate, consider using both!
Helmet-mounted lights are generally the less-expensive option, ranging from $75 to $200. Handlebar-mounted lights start around $150 and go as high as $700, but there are numerous price points in between. There are advantages to both types of lights depending on how and where you ride. For fast nighttime trail riding, many riders feel it's best to use both.
Helmet-mounted lights let you look where you want to go, which is very helpful in corners. They also reduce shadows of rocks and other trail debris. However, they can get snagged on tree branches and add weight to your helmet. Often, a spot light pattern is chosen for your lid when using both helmet and handlebar set ups.
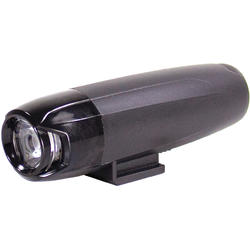
Handlebar-mounted systems put the weight on your bike, not on you. A flood light beam is typical for handlebar-mounted lights. It will illuminate the entire trail corridor, letting you see all the lines. The downside is a long shadow(s) on the ground, due to the angle of the light's beam.
 When using handlebar and helmet lights you may only need to switch on both lights for fast descents or technical sections. Conserving the battery power in your helmet light during slow sections or climbs leaves you with enough power to use it as an emergency backup for trailside repairs or unexpected delays, too.
Remember, it doesn't hurt to end your ride with power to spare. But coming up short is a night-riding no-no. So it's best to only use the amount of light you really need. The chart shows how the lights compare.
Technical considerations
Shoppers for bicycle lights today are sometimes surprised by the variety of systems available and the range of prices. This is due to the ingenious ways manufacturers optimize light output and battery power. And, how they build in features that make these lights perfect for cycling, such as ways to include the battery.
For those of you who are interested in some of the science behind the lights, we offer this next section. (You certainly don't need to master this information to get a nice light.)
Brightness
When considering bicycle lights, wattage is the most common unit used to describe a light's power and it's one way to gauge how much brightness a system offers. However, technically speaking, wattage is actually a measure of a light's power consumption, not really the amount of light that it produces. A lumen is the international unit for the actual amount of light that's produced, equal to the amount of light given out by one candle radiating equally in all directions.
Batteries
Li-ion batteries are the most popular type found in bicycle lights (and consumer electronics) because they boast one of the best energy-to-weight ratios, low maintenance, and no memory effect. Even better, they offer a higher power density, which means longer run times from a super-light battery (lithium is the lightest of all metals).
Another great advantage is that Li-ion batteries cannot be overcharged. Plus, they lose only 5% of their charge a month, so they're ready to go when you (or your buddies) are.
A drawback of Li-ion batteries is a fixed life cycle, independent of the number of charge/discharge cycles. This means that a 3-year-old Li-ion will have less run-time when fully charged than a new Li-ion battery that's fully charged.
 Carrying batteries
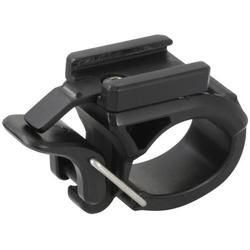
Handlebar-mounted light batteries are usually strapped to the frame or integral to the light itself.
Batteries for helmet-mounted lights are usually strapped to the back of the helmet or fit into, or are placed in a hydration pack or backpack (or in your jersey pocket if you don't use a pack).
We’ll gladly show you how both the light and battery attach if you have any questions about any lighting system. You only need to tell us what bikes you want to use it on and we can show you how it goes onto your bike or one of ours.
Bulb type
![]() Almost all bicycle lights today use bulbs called LED, for Light-Emitting Diode. An LED is a semiconductor light source, used everywhere today from in stoplights, to household lighting, to billboards.
Almost all bicycle lights today use bulbs called LED, for Light-Emitting Diode. An LED is a semiconductor light source, used everywhere today from in stoplights, to household lighting, to billboards.
High-power LEDs can be focused to produce huge amounts of lumens with impressive battery life and run times. They are shock-resistant so the inevitable knock and hits from mountain biking and rough roads are not an issue. Additionally, their tiny size and low weight combined with almost-instant on/off make them ideal for cycling.
Other benefits of LEDs include the fact they get dimmer (rather than just breaking) as they near the end of their life. And speaking of their lifetime, these little lights can last from 10,000 - 15,000 hours. Now that's a lot of riding!
Downsides are few, as bicycle light companies have worked through many of the disadvantages which included ways to cool the bulb and regulate voltage sensitivity.
And now, some of our best night-riding light tips
|
Basics |
|
|
Essentials |
|
|
Look out! |
|
We hope these tips help you find the perfect bicycle light and we look forward to showing you our excellent selection!